
Week 2
ZBrush Review Part 2
BRUSH VIDEOS
Timecodes listed on YouTube
Week 2 Archive
-
Date Time: 2026-02-06 12:46:50
Location: BB16
Instructor: Ryan Darling
Summary
This lecture is a tutorial for ED401, week two, focusing on character creation techniques in ZBrush. The instructor demonstrates a method for rapidly generating design ideas by leveraging randomization and symmetry, referred to as the "Rorschach approach." The core technique involves using a "Chaos Brush" to place various geometric shapes onto a base sphere or "pinhead." Key tools and settings are covered, including Mesh from Brush, symmetry (X key), the Gizmo tool (W key), and the Snake Hook brush. A critical aspect of the workflow is using Auto Masking by Polygroup to efficiently manipulate individual parts. The instructor also presents an alternative method starting from a quick sketch and building volumes with spheres, emphasizing speed and avoiding excessive detail in the initial stages. The overall goal is to help students, especially newer artists, break free from their design comfort zones and quickly develop complex forms for characters.
Knowledge Points
1. Initial Setup and Brush Usage
Preparing the Scene
Start by creating a sphere. Press 'T' to enter Edit mode and 'CTRL-N' to clear the canvas of any accidental marks.
Convert the sphere into a PolyMesh3D to enable sculpting.
Using the Chaos Brush
The instructor uses a custom "Chaos Brush" which can be selected. Pressing 'M' reveals the various meshes (like pinheads) contained within the brush.
To avoid asymmetry, do not drag the shapes directly onto the sculpting surface.
The correct method is to select the desired mesh from the brush (e.g., "pinhead one"), then navigate to Geometry > Modify Topology and select "Mesh from Brush." This replaces the current object (the sphere) with the selected mesh, ensuring it is perfectly symmetrical.
Brush Modifier Settings
To prevent the brush from randomly cycling through its contained meshes, go to Brush > Modifiers.
Set the "Multi-Selector Mode" slider to zero. This ensures the brush remains static and uses only the currently selected mesh.
2. The Rorschach Approach to Design
Core Principles
This method capitalizes on two main aspects: randomization and symmetry.
By applying random shapes symmetrically, the mind performs an "anamorphic projection," allowing the artist to see potential forms and designs, similar to an inkblot (Rorschach) test.
This approach helps an artist stay within the general constraints of a project brief (e.g., "short and fat" vs. "tall and slim") without getting boxed in by specifics too early.
Workflow
Activate symmetry by pressing 'X.'
Select various parts from the Chaos Brush and add them to the base pinhead.
Use the Gizmo tool (W) and the Snake Hook brush to pull, push, and position these new pieces on the surface.
The initial goal is not to be too representational but to play with forms and "dance on the surface."
Continue adding pieces until the entire pinhead is covered, then use the Snake Hook brush to blend and unify the parts into a visually appealing form.
Emulate natural anatomy, like the flow of neck muscles (sternomastoid) to the clavicles, to guide the form.
3. Advanced Tools and Techniques
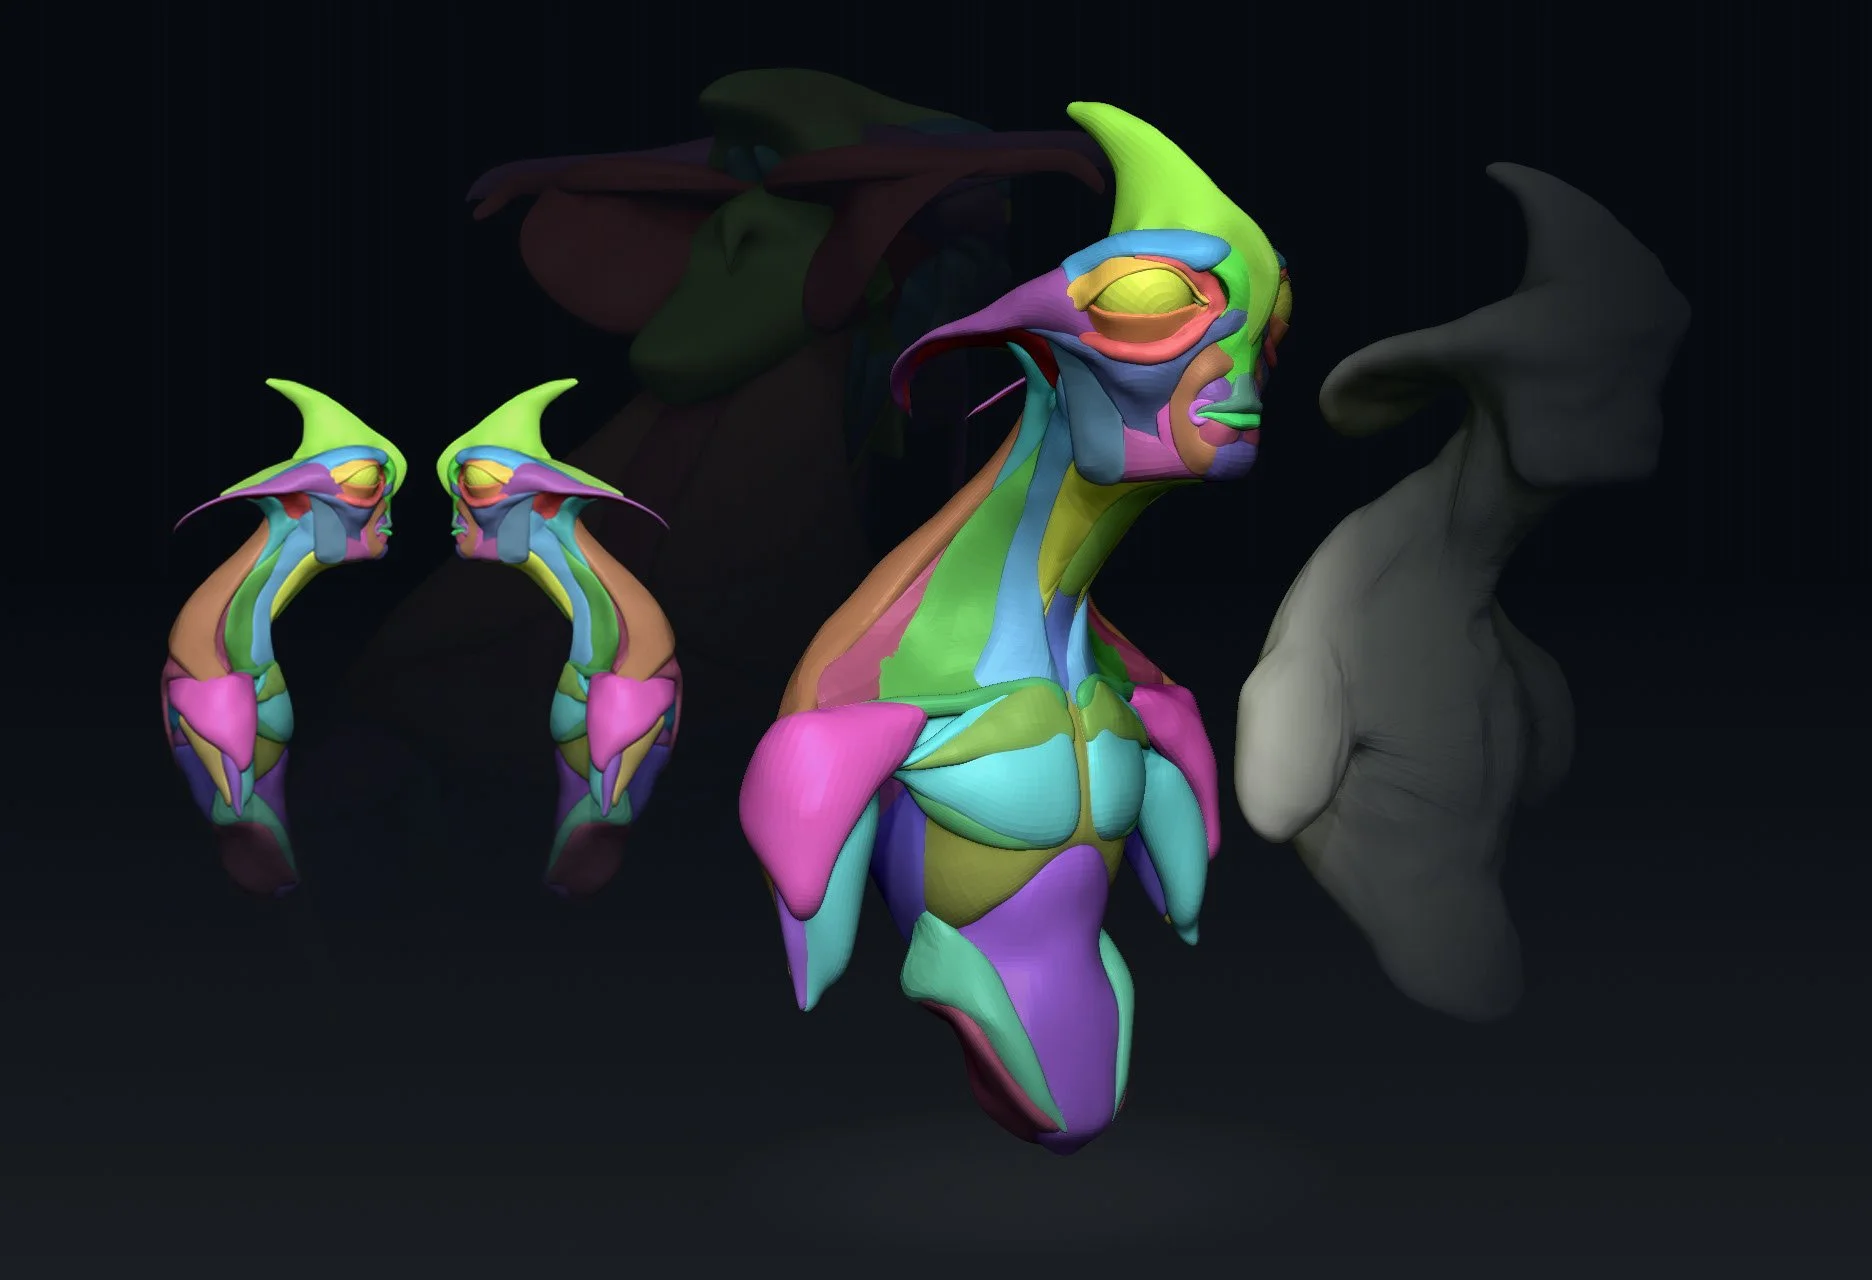
Auto Masking by Polygroup
Each new piece of geometry added to the model is automatically assigned a new polygroup.
To manipulate individual pieces without affecting others, use Auto Masking under Brush > Auto Masking.
Set "Mask by Polygroups" to 100.
With this enabled, a brush (like Snake Hook) will only affect the polygroup directly under the cursor center, allowing independent movement of parts even with a large brush size.
Hiding and Evaluating the Form
Hide the original pinhead periodically to evaluate how the added elements look on their own.
Using the Classic Transpose Tool for Duplication
Switch from the default Gizmo to "Transpose Classic" (found at the bottom of the Brush palette).
To duplicate an object on the fly, hold 'CTRL' and drag off the unmasked object to create a copy.
To create an array of objects, hold 'CTRL' while dragging to make a copy, then release 'CTRL' (while still holding the cursor down) and drag further to create multiple copies in a line.
Gizmo Manipulation
Holding 'ALT' while the Gizmo is active allows you to move the Gizmo's pivot freely without affecting the mesh.
4. Alternative Sketch-Based Workflow
From 2D Sketch to 3D Form
An alternative to the randomization method is to start with a very quick, small thumbnail sketch. Sketching small forces focus on volume and form rather than detail.
The instructor showed an example where a 1.5–2 minute sketch established a general shape.
This sketch was then used as a guide to create a base shape in ZBrush using a sphere and Dynamesh.
Building Volume with SubTools
Instead of using the Chaos Brush, use simple spheres as a new SubTool to build out volumes inside the initial Dynameshed form.
This process is similar to the pinhead method but uses basic primitives to fill out the form.
Work on only one side first. Once a system (like a shoulder) is worked out, mirror and weld it to the other side.
Extensively use the Snake Hook brush to negotiate shapes into place.
After establishing the form, perform ZRemeshing to create better topology.
Process Overview
AT A GLANCE

2D SKETCHING
Establish Shape Language
Implicit Design
DYNAMESH BLOCKOUT
SHAPE BUILDING
LAYERS
VARIANTS
ITTERATIVE DESIGN
Attributes vs. Variants
Our goal now
Segmentation & Primary Shape Tracing (Attribute Control)
Build Primary Shape Layers (Sihlouette Control)
Layer mixing and its Process
REFINE
Dynameshing your parts together
Refine your surface with Dam Standard, Clay buildup, Clay brush, Smooth and the Standard Brush
Project onto new model with Clean topology
Step1: Duplicate your symmetrical dynamesh
Step2: With symmetry turned on, ZRemesh your model, Subdivide the model and project the detail onto the new mesh from your original source mesh.
Detail Work
Create a morph Target: This will allow you to brush away mistakes returning the surface to the original state of the mesh from when the morph target was created.
Apply Alphas: Begin by testing with large areas with low frequencies
Refine tertiary design with Dam Standard and Smooth Brush
SCULPT REFINEMENT
POLYPAINT
GREYSCALE CONCEPTING
In this phase we’ve translated our designs from 2D to 3D. We want to make sure we don’t jump into our details too soon an sacrifice time and quality as a result. Rather we need to remain focused on what is relative at the appropriate times as we journey through the process of sculpting our concepts. Keep in mind the initial sketches will serve only as a guide for were to start. We want to allow the design to evolve throughout the process and as artists remain dynamic for what the form is expressing - all the while adhering to the request of our clients. Clients can be like wildcards giving feedback that could potentially make or break a design. Sometimes it is our job to hold their hand through the process all the while meeting their needs.
Dynamesh Blockout:
Sculpting in Values: Sculpting with light.
ZSketching: From the surface you should be able to derive your pattern from your design. Note the patterns of rest and the patterns of noise, areas of confusion and detail.
Areas of Rest: (Primary Shapes)
Areas of Noise: (Tertiary Shapes)
Tip: Mask out your patterns and change your Matcap material to the flat white material. This will help you to identify how your patterns are establishing themselves within your design and gives you a Rorschach type peak into how the presentation of your character is reading to the audience.
PRESENTATION (Preliminary)
OUTPUT
RENDERING
3D PRINTING
PRESENTATION (FINAL)
PRESENTATION FINAL
Painting Values
Goal: Push and pull the Surface with lights and dark pigment
Utilize the surface to drive the masking and texture result
Lighting
Goal:
3 Point Lighting
Rendering in Redshift
Photoshop Compositing