
Week 2
ZBrush Utility Tools
This week we will cover:
Gizmo, Knife, Slice, Trim, and Clip, Masking and Selections, Dynamesh Subtraction, Orthographics in PS, Image Grids in ZBrush, Blocking out the Form, Curve Bridge, Backface Mask, Mirroring, Modify Topology, IMM Brush Basics
Week 2 Archive
-
Date Time: 2026-02-06 16:19:05
Location: BB10
Instructor: Ryan Darling
Summary
The 2026-02-06 session for Intro to Digital Sculpting (MD 205) centered on practical ZBrush workflows, tool proficiency, and a speed-focused pipeline for designing and refining a non-representational creature skull. After housekeeping on recordings, website navigation (darling3d.com > Courses > L CAD > Intro to Digital Sculpting MD 205 > Week 2), and support availability, the instructor demonstrated ZBrush setup (Preferences > Initialize ZBrush), Dynamesh access (Lightbox > Project > Dynamesh spheres), and core manipulation with Gizmo/transpose, masking, solo mode, symmetry, pivot control, multi-subtool operations, and duplication. Students explored curve cutting tools (Clip vs. Knife vs. Trim), Split to Parts, Split Hidden, and polygroups for isolation and topology control. The lecture expanded into hard-surface slicing, IMM primitive booleans with Dynamesh subtraction, troubleshooting, symmetry and Mirror and Weld directionality, Sculptris Pro dynamic topology, and resolution/aliasing considerations. Presentation workflows covered ZAppLink camera bookmarks, automated character sheets to Photoshop, grid projects for reference planes, and mitigating halo artifacts. The project pipeline emphasized rapid chaos-brush blocking, layer-based variation systems, generating 50 variants for voting, consolidation with Dynamesh, ZRemesher retopo, detail projection, multi-pass refinements with alphas and contrast control, deliverables (PNG slides and turntable), and preparation for potential 3D printing. Additional topics included UI efficiency (Alt-click palette retrieval), custom UI design, auto masking, import/insert/append asset management, versioning with “Save Next,” resource acquisition (promo code L-CAD), scan data usage (e.g., Smithsonian), citation guidance, portfolio presentation, and industry context including technical art, rigging, posing practices, and localization/update cycles.
Knowledge Points
1. Course Logistics and Support
Recordings capture demos; homework info may be included case-by-case. Instructor offers extra help and will investigate student account issues.
Materials hosted on darling3d.com; navigate via Courses > L CAD (uppercase) > Intro to Digital Sculpting MD 205 > Week 2.
New systems were used; tools previously unstable (e.g., Knife) revisited.
2. ZBrush Setup, Gizmo/Transpose, and Manipulation
Initialize ZBrush, load Dynamesh sphere (e.g., Dynamesh 32), close Lightbox with comma key.
Gizmo activation (W) and legacy transpose line (W/E/R). Symmetry (X), Solo mode, uniform/per-axis scaling, rotation, 2D movement aligned to camera, history scrub via top orange dot.
Pivot control: hold Alt to move pivot; center to object; Alt-click circular arrow to reset orientation. Keep orientation aligned to “face” compass for portraits.
Multi-subtool manipulation via “pancake stack” icon; control-drag to mask; verify masks when multi-manipulation fails.
3. Advanced Duplication and Use Cases
Hold Control and drag Gizmo arrows to duplicate; release Control to continue movement and auto-space duplicates. Freeform arrow supports path-based placement for chains, buttons, columns, piping.
4. Clip, Knife, and Trim Curves: Behavior and Best Practices
Access via Control+Shift brush menu; set Stroke to Curve as needed.
Clip Curve compresses to a plane (does not cut). Knife Curve performs true cuts, creating polygroups and triangles at borders; start/end off-model to avoid topology issues. Alt/Option taps add curve points; double-tap for sharp angles.
Trim Curve differs from Knife, can leave triangles and silhouette mismatches; avoid when expecting clean disappearances.
5. Split to Parts, Hard-Surface Steps, and Splitting
While cutting, press spacebar to toggle “Split to Parts”; assign polygroups if not auto-set.
Align Gizmo to a surface (Alt-tap), scale slightly, reveal hidden portions (Control+Shift) to create stepped, hard-surface effects; use Split Hidden to separate parts.
6. Polygroups: Isolation, Creation, and Topology
Control+Shift selection isolates visible geometry; Double in Display Properties shows inside surfaces to assess watertightness.
Create polygroups via Control+W; toggle isolation by Control+Shift tapping. Lasso selection supports freeform shapes; press spacebar to move selection before applying.
Edge loop selection works with clean perpendicular topology; invert selection by Control+Shift dragging off-model; expand/shrink via Control+Shift+X/S. Dynamesh can disrupt clean loops.
Control+W with everything visible unifies to one polygroup; build multiple groups to manage complex sculpts.
7. Polygroups Selection Behavior and Slice/Knife for Hard Surface
Control+Shift taps isolate single or adjacent polygroups; clicking borders includes multiple groups. If polygroup creation fails, verify features or restart ZBrush.
Slice creates polygroups independent of topology for edge control (e.g., automotive speed lines); Knife/clipping tools prep surfaces before further operations.
8. Dynamesh, IMM Primitives, and Boolean Subtraction
Start Dynamesh at ~32; increase to ~225+ to retain detail and polygroups; Control-drag off-model to re-Dynamesh.
IMM Primitives: press B, choose non-H variants for full shapes; hold Alt to insert as subtractive (white preview). Ensure confident penetration; execute by Control-dragging off-model twice to process booleans.
Troubleshooting: Control N clears document; check double-sided visibility; increase Dynamesh resolution; ensure a surface change before re-Dynamesh; verify active subtool and Dynamesh state.
9. Symmetry, Mirror and Weld, and Resolution
Symmetry-aware booleans mirror operations; ensure full penetration to avoid mirrored artifacts.
Mirror and Weld commonly copies right to left; verify side source or use Deformation > Mirror as needed. Behavior may vary in current versions.
Low Dynamesh resolutions cause staircasing; increase resolution to reduce aliasing and retain detail.
10. Sculptris Pro Dynamic Topology
Topology changes based on brush size: large brushes add broad triangulation, small brushes add fine detail. Use Shift smoothing with large brushes to refine. Avoid early micro-detailing to prevent uneven topology.
11. ZAppLink Workflow and Photoshop Character Sheets
ZAppLink Properties: set Front/Back, Right/Left, Top/Bottom; verify orientations. Turn off Perspective for alignment; set custom three-quarter views.
“Make Character Sheet” exports to Photoshop with layers; use M and V to place into templates. Update character sheets by re-running export; duplicate documents to preserve versions.
Fix halos by extending background gradient (select sliver, Control T, Alt+Shift scale) to increase edge opacity.
12. Grid Project and Floor Alignment
Open Lightbox > Projects > Demo > grid.zpr to use axis image planes. Toggle floor X/Y/Z planes; disable Perspective for alignment. Start blocking on provided Dynamesh sphere; Sculptris Pro off for predictable topology.
13. UI Efficiency, Customization, and Alt-Click
Alt-click any UI element to pop out its palette into the tray. Floor grid offers fill modes (1 faint, 2 ~50% opacity, 3 Fresnel-like see-through) and cursor-linked guides for multi-view alignment.
Plan multiple custom UIs per workflow (Dynamesh, organic, hard surface). Enable “Enable Customize,” Alt-drag items to trays; layouts/colors can be adjusted.
14. Canvas/Document and Brush Management
Document > Range adjusts canvas visibility when empty.
Chaos brush: disable randomization via Brush > Modifiers > MultiMesh Selector = 0; turn symmetry off before placement as needed. Press M to view brush models; ensure inserts intersect base to fuse.
15. Dynamesh Fusion, Smoothing, and Resolution Management
Fuse inserts with Control-drag off-model; if weld quality is poor, increase Dynamesh resolution (e.g., ~400+) and re-Dynamesh. Smooth (Shift) to remove faceting; re-Dynamesh when geometry breaks/tears. Use ClayBuildup, Standard, DamStandard, SnakeHook; S to adjust Draw Size.
16. ZRemesher, Mesh Integrity, Subdivisions, and Projection
Duplicate Dynamesh subtool (“Dyna” to “Dyna1”); ZRemesher target in thousands (type values directly). If errors occur, use Mesh Integrity (Check/Fix) then rerun.
Manage subdivisions and polycounts; subdivide to capture finer detail. Project details via Subtool > Project > Project All; iterate divide/project until gains plateau. Organize source meshes in an “edits” folder and hide when done.
17. Texturing and Alphas
Load alphas via Lightbox; convert textures to alphas with “Make Alpha” if misloaded. Use Standard brush with DragRect or Color Spray; lower intensity for subtle breakup; Alt inverts stroke.
18. Saving, Versioning, and Workflow Discipline
Save projects via File > Save As; use “Save Next” to maintain incremental versions (_001, _002). Keep last few versions and archive older ones.
19. Project Pipeline: Variations, Voting, and Refinement Passes
Chaos-brush blocking over pinhead; limit scope to skull/jaw; rigid additions allowed. Build 15–20 layers as a “gene pool” of global/local variations; cap ~15 layers per creature for combinatorial mixing.
Generate ~50 variants by duplicating and adjusting layer sliders; bake layers per variant; organize naming (var 1, var 2, etc.) to match voting sheets.
Collect 50–100 votes; choose one of the top three to proceed. Dynamesh skull, jaw, teeth; weld and soften seams; treat all surfaces with ClayBuildup and DamStandard. Design internal cavities; finalize openings and sculpt interiors.
ZRemesher with symmetry on; Close Holes for missing polygons; project details. Second pass blends seams and fixes bad projections near close surfaces; third pass applies and blends alphas.
Use a “contrast delta brush” to enhance select details; reserve true white/black for final 10–15% to maintain value headroom.
20. Reference, Scan Data, Bases, and Citation
Transition from exploration to reference-driven refinement; include AI-generated references marked clearly on reference slides. Leverage anatomy references.
Download anatomical textures, bases/plinths (watertight), and free scans (e.g., Smithsonian OBJ). Import, isolate parts (e.g., teeth), append as subtools, position/mirror, weld via Dynamesh. Cite external sources professionally.
21. Polygroups, Auto Masking, and Group Management
Auto masking in Brush settings to lock non-target areas. Auto Groups assigns based on connectivity; Merge Similar groups identical instances. If merged unintentionally, isolate regions, expand (Control+Shift+X), reassign polygroups (Control+W). Selection shortcuts: expand (X), shrink (S), reveal connected (A).
Near symmetry center, SnakeHook may stall; use Inflate (B I N) to expand intersections.
22. Import vs. Insert vs. Append and Safe Import
Import brings assets in; unzip first. Append adds to bottom of SubTool list; Insert places beneath the active SubTool. Select a sphere before import to avoid overriding active work.
23. Presentation Deliverables and Turntable
Output PNG-only slides and a turntable render; organize deliverables in the designated folder with variant numbering aligned for critique.
24. Industry Context, Rigging, Posing, and Localization
Course prioritizes tool proficiency over portfolio pieces; practice accelerates speed. Pose characters out of T-pose into heroic poses; avoid portfolio T-poses unless necessary. T vs. A pose depends on body type; heavy characters may favor T-poses.
Tech artists build/fix tools; partial automation plus manual tweaks is pragmatic. Localization cycles: Asian markets receive updates first; English materials follow; early adopters encounter more bugs.
25. Class Logistics and Communication
Timeline: break set during class; by next class, reach alpha/refinement stage; one week for detailing and projection; final class for slides and critique. Recordings posted atop each week’s page; Discord invite via recap email. Ensure home ZBrush version matches on-campus; screenshot version info if needed. Students should reach out if stuck for 30 minutes; rest is encouraged after heavy weeks.
Assignments
Navigate to darling3d.com > Courses > L CAD > Intro to Digital Sculpting MD 205 > Week 2 and review ZBrush utility tools.
Initialize ZBrush; load a Dynamesh sphere; practice Gizmo operations (pivot repositioning, centering, orientation reset), solo mode, symmetry, masking/unmasking, and multi-subtool manipulation.
Practice Gizmo duplication via Control-drag (axis and freeform) to create evenly spaced and path-based instances (chains, columns).
Compare Clip, Knife, and Trim Curves; perform Knife plane cuts; use Alt/Option taps; ensure cuts start/end off-model.
Use spacebar with Knife to toggle Split to Parts; create stepped cuts via Gizmo alignment (Alt-tap), slight scaling, reveal hidden sections, and Split Hidden.
Create/manage polygroups: isolate via Control+Shift or Lasso; assign via Control+W; enable Double to check watertightness; practice edge loop selection, inversion, expand (Control+Shift+X), shrink (Control+Shift+S).
Practice polygroup isolation at borders (single/dual/triple); restart ZBrush if behavior fails.
Perform Dynamesh subtraction with IMM primitives: set Dynamesh ~225+, insert subtractive primitives (Alt), ensure penetration, execute boolean via double Control-drag off-model; test with symmetry and note artifacts.
Troubleshoot subtraction: resolve hollow interiors, camera-follow issues, gizmo visibility, re-Dynamesh triggers, and subtool/Dynamesh state.
Apply Mirror and Weld (right-to-left) to propagate features post-boolean; document results.
Experiment with Sculptris Pro: large-brush topology changes and Shift smoothing; test small-brush detailing; note pros/cons.
Set ZAppLink bookmarks (Front/Back/Right/Left/Top/Bottom + two custom 3/4 views); export character sheet to Photoshop; organize layers, duplicate documents, and practice updates.
Fix halo artifacts by extending background gradients with Control T and Alt+Shift.
Open grid.zpr; align sculpting to reference planes; toggle floor axes; disable Perspective; block forms on Dynamesh sphere with Sculptris Pro off.
Build a non-representational skull: pinhead base, chaos brush inserts, SnakeHook coverage; create 15 layers; duplicate ~50 variants; adjust layer sliders; number and prepare for voting (50–100 votes).
Dynamesh skull, jaw, teeth; weld and smooth seams; treat surfaces; design internal cavities; finalize openings and sculpt interiors.
Duplicate Dynamesh; ZRemesher with symmetry on; fix holes via Close Holes; subdivide and Project All iteratively until detail is crisp; manage polycounts (~8M target, avoid >14M per object).
Import alphas; apply with Standard + DragRect; blend alphas in a third pass; use contrast delta brush selectively; reserve full contrast for final 10–15%.
Download chaos brush and alphas from darling3d.com with promo code L-CAD (uppercase); provide email/address (no credit card).
Alt-click palettes to dock; adjust floor fill modes; use cursor guides for multi-view alignment.
Manage imports: unzip assets; Import under a safe sphere; Append/Insert to place subtools; use Gizmo and Alt-tap for orientation; position/mirror teeth or scan parts; weld via Dynamesh; cite sources.
Save project with File > Save As; use “Save Next” for incremental versions; organize source in an “edits” folder.
Join class Discord via recap email; ensure your home ZBrush version matches campus; reach out if stuck for 30+ minutes; review week-two recap when posted.
Gizmo
The Gizmo is ZBrush’s primary transformation system for moving, rotating, scaling, deforming, and duplicating geometry with precision. It allows artists to manipulate entire SubTools, masked regions, polygroups, and transpose selections while maintaining accurate pivot control. The Gizmo supports advanced operations such as soft transforms, array duplication, deformations, and boolean alignment. In production workflows, the Gizmo is essential for blocking proportions, aligning parts, creating symmetry variations, and performing non-destructive layout adjustments before committing to sculptural refinement.
Primary Use Cases:
Blocking proportions and spatial relationships
Positioning hard-surface components and anatomical landmarks
Duplicating and aligning elements for symmetry and modular workflows
Pivot placement for mechanical articulation and deformation setups
Knife
The Knife tool enables precise planar cuts through geometry using interactive line placement. It is commonly used in conjunction with Live Boolean workflows to create sharp mechanical separations, panel lines, and controlled breakups in topology. Knife cuts generate clean intersections that can later be remeshed or finalized into Boolean meshes. This tool is ideal for establishing crisp edges, controlled segmentation, and technical surface definition during hard-surface blocking and refinement.
Primary Use Cases:
Creating straight cuts and panel separations
Establishing mechanical silhouettes and structural divisions
Preparing meshes for Boolean workflows
Rapid prototyping of shape variations
Slice
Slice creates new polygroups by cutting through geometry without removing material. Unlike Knife or Clip, Slice preserves the mesh volume while reorganizing topology into selectable regions. This makes it an organizational and control tool rather than a destructive modeling operation. Slice is invaluable for isolating regions for masking, polygroup management, panel extraction, and controlled subdivision workflows.
Primary Use Cases:
Creating clean polygroups for selection and masking
Preparing meshes for panel extraction or detailing
Segmenting complex forms into manageable sculpting regions
Establishing logical topology organization
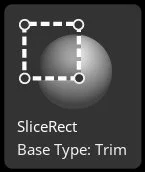
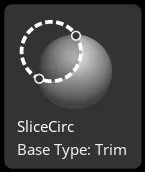
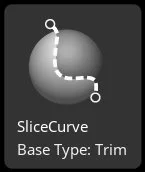
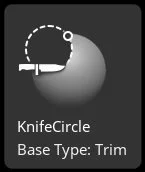
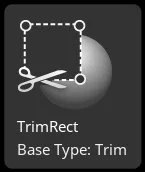
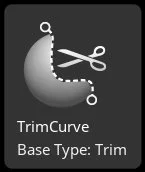
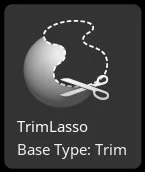
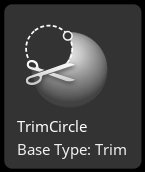
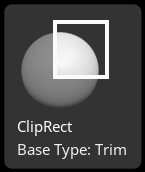
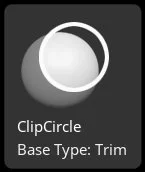
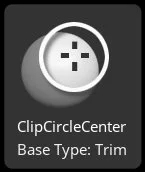
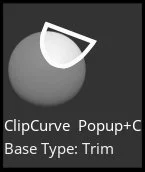
Trim
Trim brushes remove surface volume while flattening areas toward a planar result. They are used to define hard edges, planes, and transitions while preserving a sculptural feel. Trim tools are critical during the mid-stage sculpting phase when artists refine primary and secondary forms, sharpen planes, and establish material behavior. Trim helps bridge the gap between organic sculpting and controlled surface definition.
Primary Use Cases:
Establishing planar surfaces and sharp transitions
Refining hard-surface forms and mechanical edges
Cleaning noisy surfaces and flattening irregular geometry
Sculptural plane control on anatomy and props
Clip
Clip brushes clamp geometry to a defined plane without removing volume, effectively compressing the mesh into a clean silhouette. Unlike Trim or Knife, Clip preserves mass while redistributing it, making it ideal for rapidly shaping profiles, creating sharp folds, and establishing strong graphic silhouettes. Clip excels in early blocking and stylization workflows where bold shape control is critical.
Primary Use Cases:
Blocking strong silhouettes quickly
Creating sharp folds and angular forms
Maintaining volume while reshaping profiles
Stylized and graphic shape development
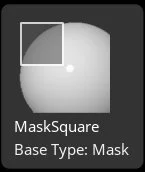
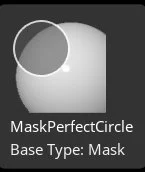
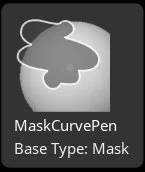
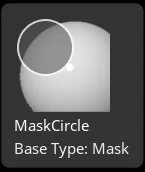
Masking & Selections
Masking and selection tools allow artists to isolate, protect, and target specific regions of a mesh for controlled sculpting and transformation. Masks act as temporary constraints that limit brush influence, while selection methods include masking by cavity, polygroups, visibility, and topology flow. Effective masking is foundational for precision sculpting, controlled deformation, detail isolation, and clean structural edits.
Primary Use Cases:
Isolating areas for focused sculpting
Creating controlled deformation zones
Extracting geometry and creating panels
Managing complex multi-part models


Dynamesh Subtraction
Dynamesh Subtraction allows artists to remove volume using subtractive meshes or brushes that dynamically rebuild topology. This workflow supports aggressive shape carving, cavity creation, and boolean-style sculpting without concern for topology integrity. Subtractive Dynamesh encourages exploratory design while maintaining evenly distributed geometry suitable for continued sculpting.
Primary Use Cases:
Carving large negative spaces and cavities
Blocking complex interlocking forms
Rapid concept sculpting and iteration
Destructive shape exploration
IMM Applied while holding Alt
Orthographics in Photoshop
Orthographic image setup in Photoshop allows artists to prepare clean front, side, and top reference views aligned to consistent scale and perspective. These orthographics are imported into ZBrush as image planes or spotlight references to guide accurate proportion, symmetry, and anatomical correctness. This workflow bridges traditional drafting accuracy with digital sculpting precision.
Primary Use Cases:
Aligning proportions during blocking
Maintaining anatomical accuracy
Matching concept art to 3D volume
Reducing perspective distortion errors
Image Grids
Image Grids provide structured reference layouts directly inside the ZBrush canvas or Spotlight system. Artists can overlay multiple reference angles simultaneously, enabling constant visual comparison while sculpting. This improves proportion control, consistency, and observational accuracy during complex builds.
Primary Use Cases:
Multi-angle reference alignment
Maintaining proportional consistency
Faster visual feedback during sculpting
Reducing reliance on external monitors
Blocking out the Form
Blocking out the form is the foundational sculpting phase where primary masses, proportions, and silhouettes are established before any detail work begins. This stage prioritizes gesture, balance, volume relationships, and spatial hierarchy. Successful blocking ensures downstream detailing remains efficient, accurate, and structurally sound.
Primary Use Cases:
Establishing overall proportion and gesture
Defining major masses and silhouette
Identifying balance and weight distribution
Preventing downstream proportion errors
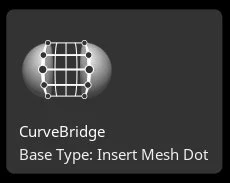
Curve Bridge
Curve Bridge generates geometry between two open edges or masked regions using curve-based interpolation. It enables artists to quickly span gaps, create structural connections, and prototype bridging forms without manual retopology. Curve Bridge is especially useful for mechanical assemblies, organic membrane structures, and rapid mesh repair.
Primary Use Cases:
Bridging gaps between mesh components
Creating membranes, straps, and connectors
Rapid mesh prototyping and repair
Concept iteration without topology overhead
Backface Mask
Backface Mask prevents brushes from affecting the backside of thin or overlapping geometry by limiting sculpting influence to visible surface normals. This avoids unintended deformation when working on thin shells, layered meshes, or tightly folded surfaces. Backface Masking improves accuracy and prevents structural damage during high-frequency detailing.
Primary Use Cases:
Sculpting thin surfaces safely
Preventing accidental backside distortion
Improving control on layered geometry
Refining clothing, armor plates, and membranes
Mirroring
Mirroring allows geometry to be duplicated and flipped across an axis, enabling symmetrical modeling and corrective alignment. Artists can mirror entire SubTools or selected regions to maintain bilateral accuracy while preserving asymmetry where needed. Mirroring is essential for anatomical correctness, mechanical precision, and efficient iteration.
Primary Use Cases:
Enforcing symmetry during early sculpting
Correcting drift and asymmetry
Duplicating mirrored components
Maintaining production consistency
Mirroring with Mirror and Weld
Modify Topology
Modify Topology tools allow artists to adjust edge flow, redistribute polygons, clean artifacts, and optimize geometry for sculpting, subdivision, or export. These operations improve mesh stability, sculptability, and deformation performance while preserving surface fidelity.
Primary Use Cases:
Improving polygon distribution
Repairing stretched or noisy topology
Preparing meshes for subdivision or export
Maintaining clean deformation flow
IMM Brush Basics
IMM Brushes allow artists to insert prebuilt mesh components directly onto a surface as reusable modular assets. These meshes can conform to surface curvature, align to normals, and be dynamically scaled and rotated. IMM workflows dramatically accelerate production by enabling kitbashing, detail stamping, and modular construction while maintaining design consistency.
Primary Use Cases:
Rapid kitbashing and detailing
Reusable asset placement
Hard-surface and ornamental workflows
Speeding up production consistency