
Week 4
Integrating Structure — The Full Creature Begins
This week we will cover:
Humanoid Creature Bust Sculpting, Basic Facial Anatomy, Topology Types, ZRemesher, Projection, Mouth Bags, Curve Lathe, Boolean Basics
Humanoid Creature Bust Sculpting

Humanoid creature bust sculpting begins with understanding that you are blending the familiar with the unknown. A humanoid design still relies on real-world anatomical structure, skull mass, jaw placement, eye depth, and neck support, but allows you to push proportions, silhouette, and surface characteristics into something imaginative. The key is grounding your creature in believable structure first. Even the most alien design feels convincing when it follows clear anatomical logic beneath the surface.
Start with large forms and silhouette before chasing detail. Establish the cranial mass, facial plane changes, and neck connection early. Think in terms of primary, secondary, and tertiary forms: primary forms define overall proportions and balance, secondary forms develop anatomical landmarks and muscle influence, and tertiary forms introduce texture and fine detail. If the bust feels unstable or unclear from a distance, the issue is usually in the primary stage. Strong creatures read clearly even in silhouette.

Finally, focus on design intent. Ask yourself what makes the creature humanoid and what makes it unique. Are the proportions elongated? Is the brow exaggerated? Are the cheekbones sharp or recessed? Push variation intentionally rather than randomly. In ZBrush, work from block-in to refinement, using tools like DynaMesh for exploration and ZRemesher for cleanup when the design stabilizes. A successful humanoid creature bust balances anatomical believability with imaginative exaggeration, resulting in a sculpt that feels both grounded and original.
Basic Facial Anatomy
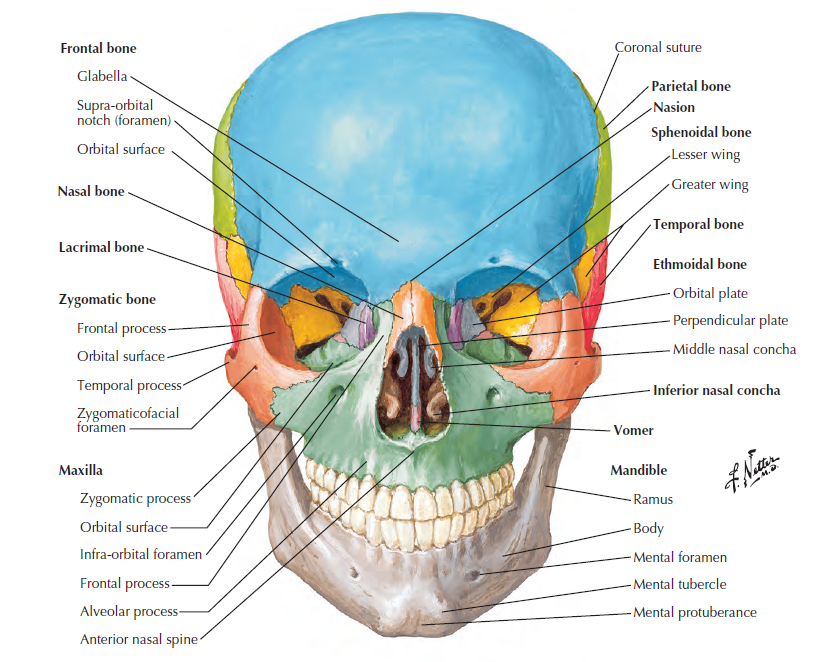
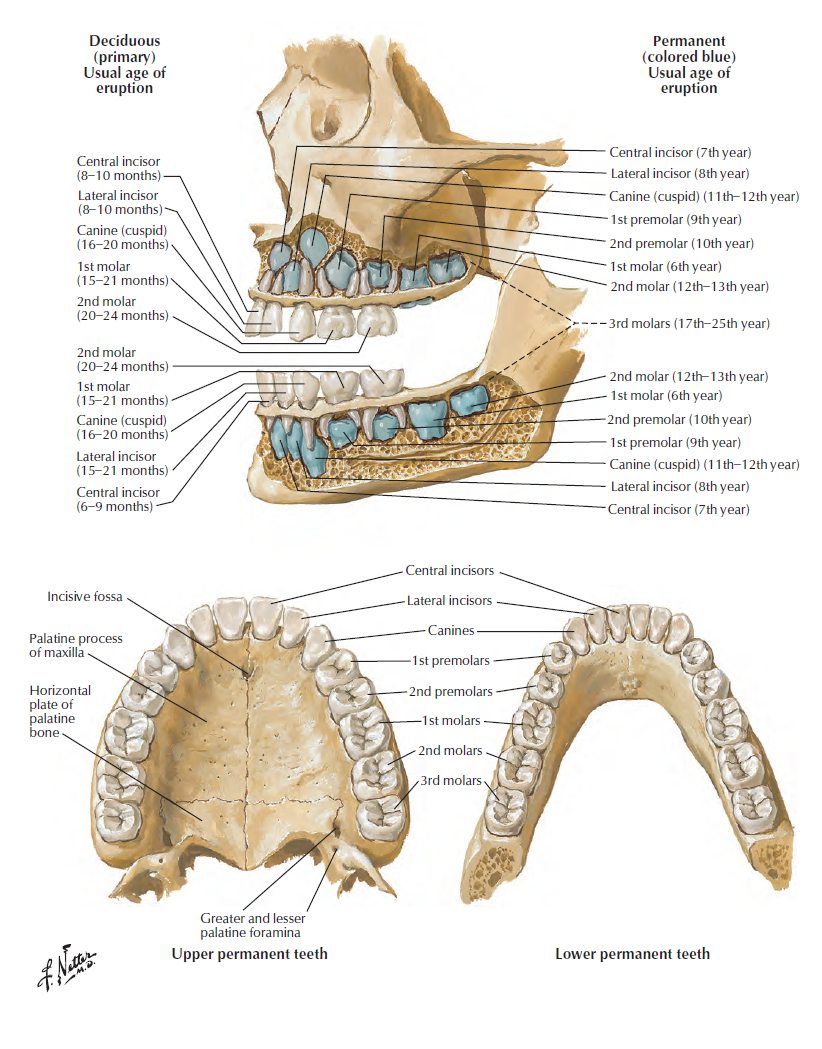
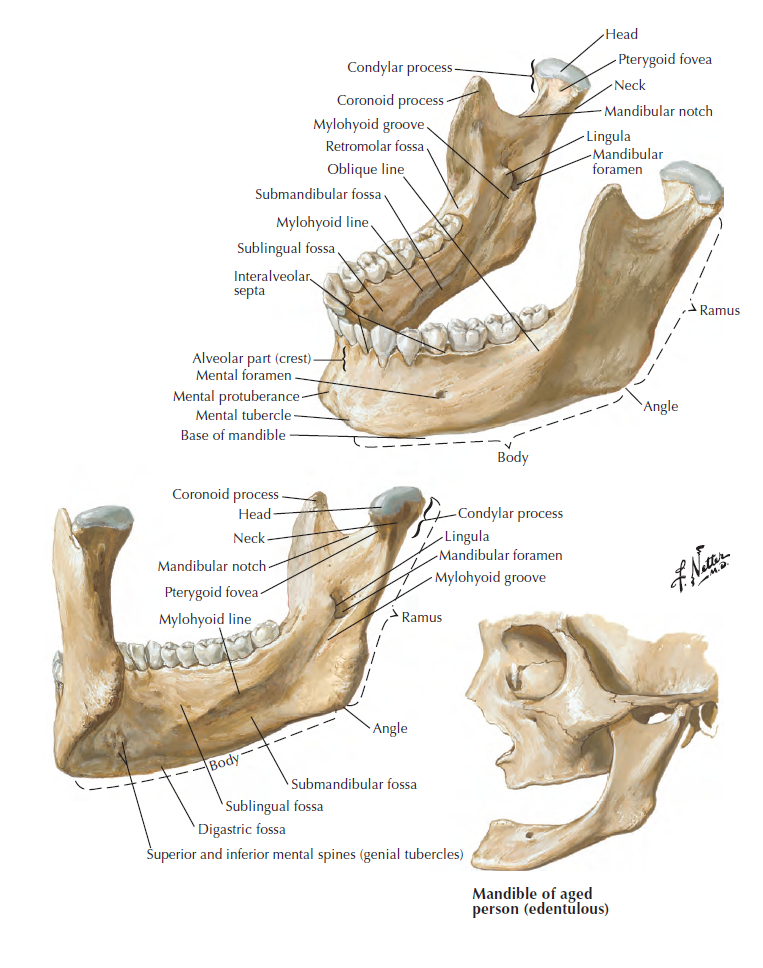
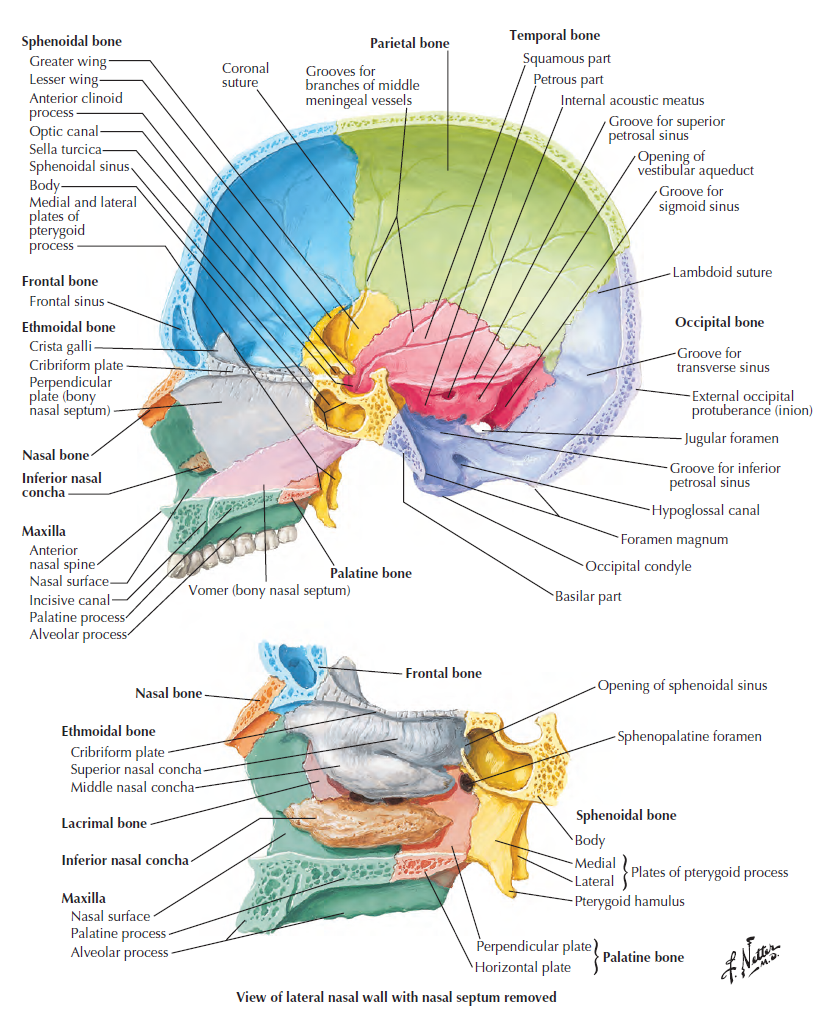
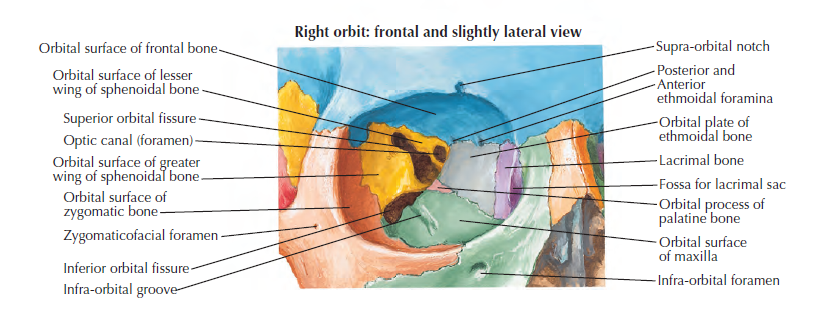
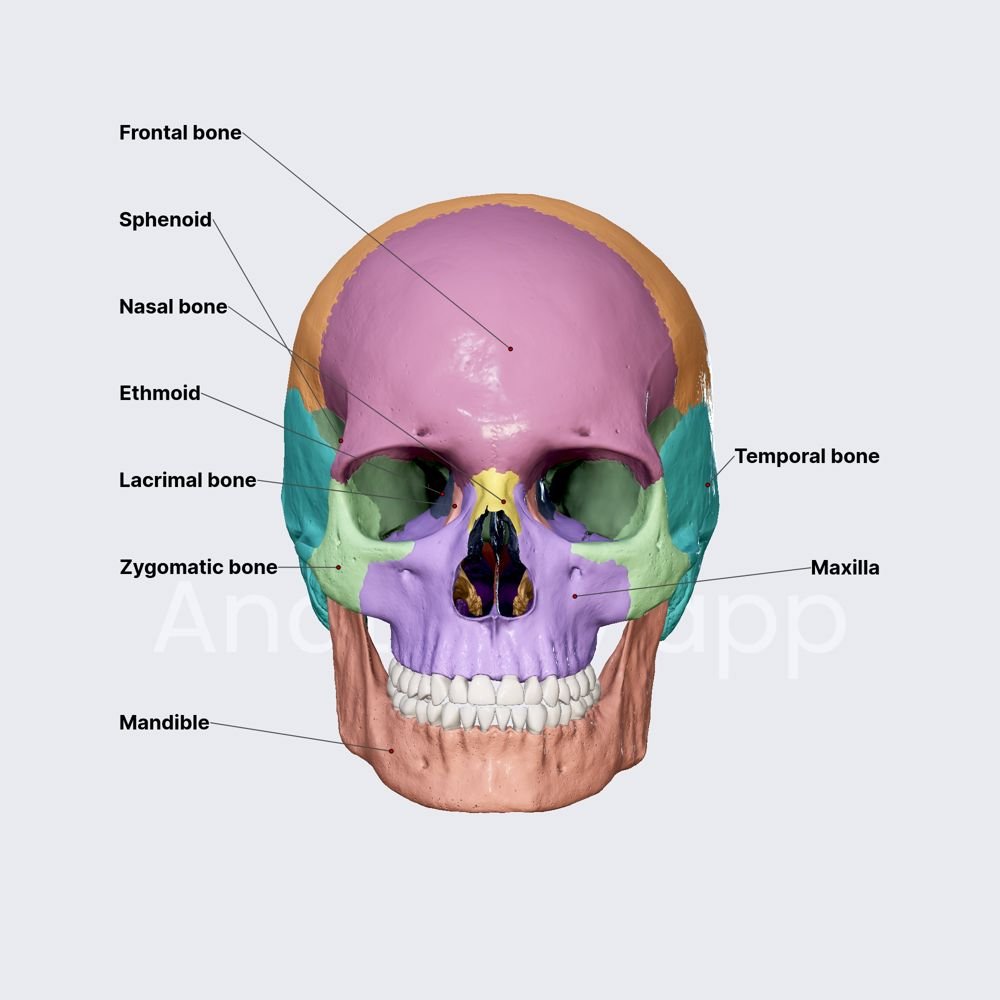

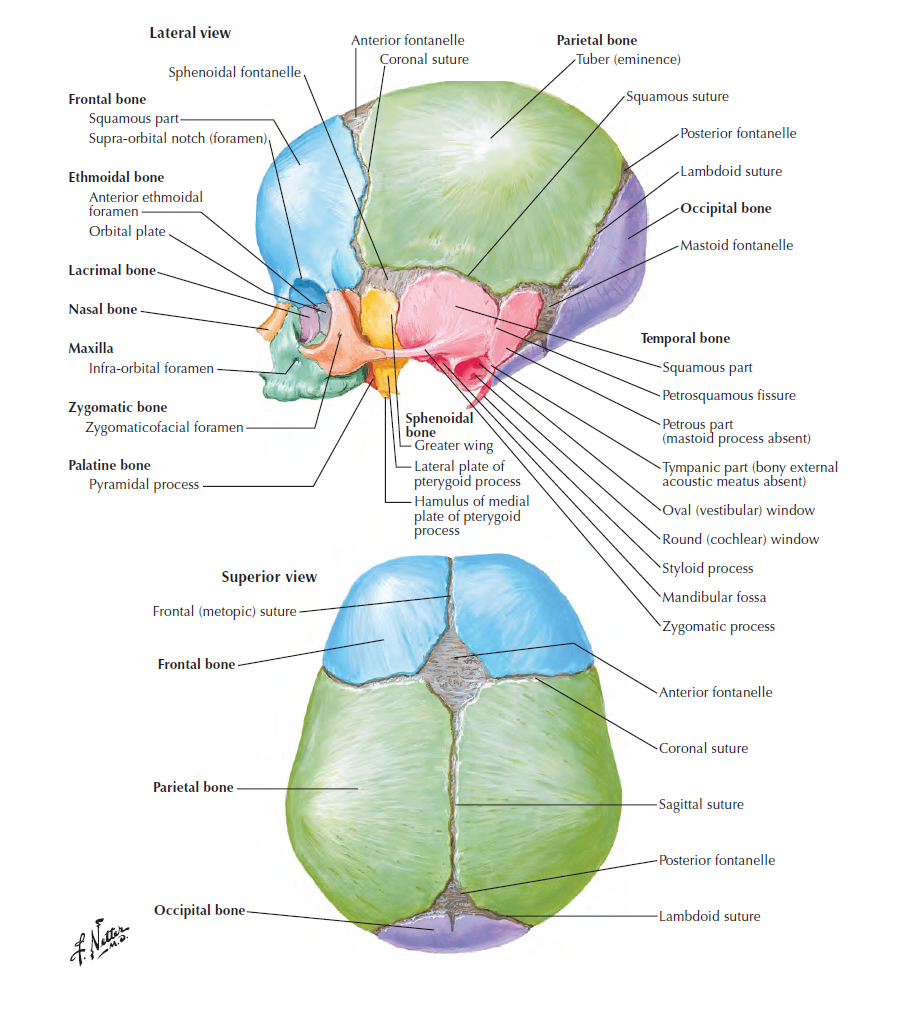
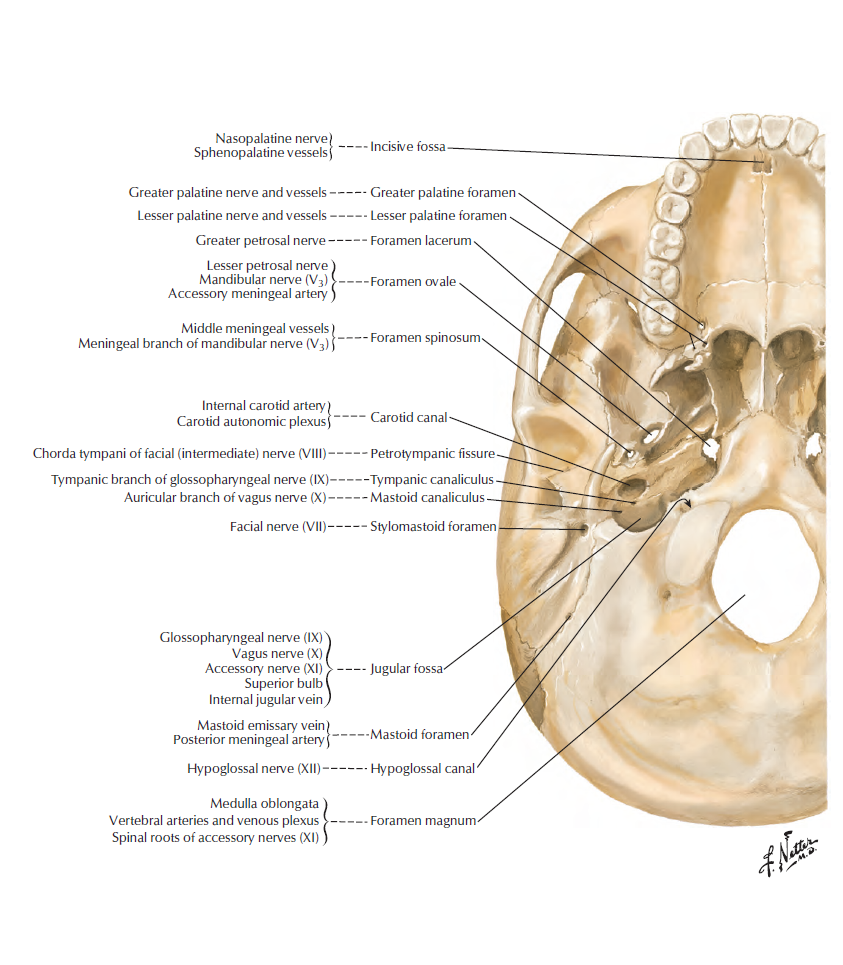
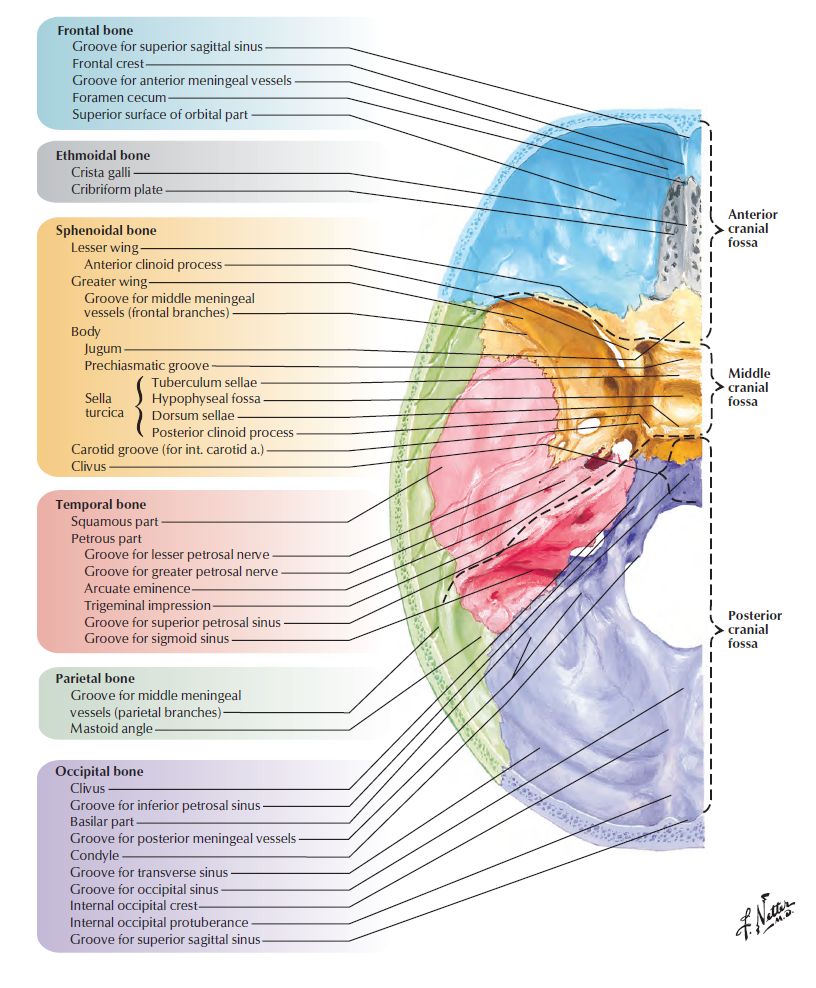

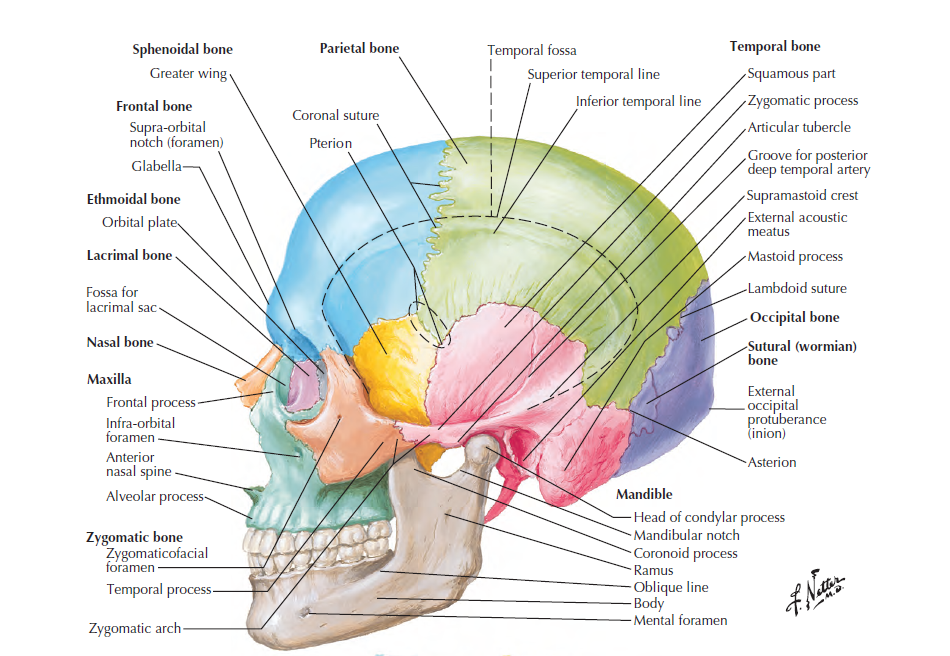
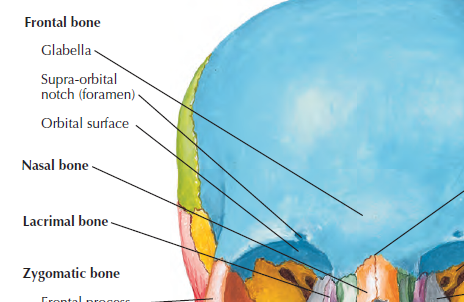

Basic facial anatomy begins with the skull. The skull establishes the proportions, structure, and plane changes that determine whether a sculpt feels believable. Key landmarks such as the brow ridge, eye sockets, cheekbones (zygomatic arch), nasal opening, and jaw define the major forms of the head. In ZBrush, think of the skull as your underlying hard structure. If the bone structure is incorrect, no amount of surface detail will fix the likeness. Always begin by blocking in the large masses and establishing the primary planes before moving into refinement.
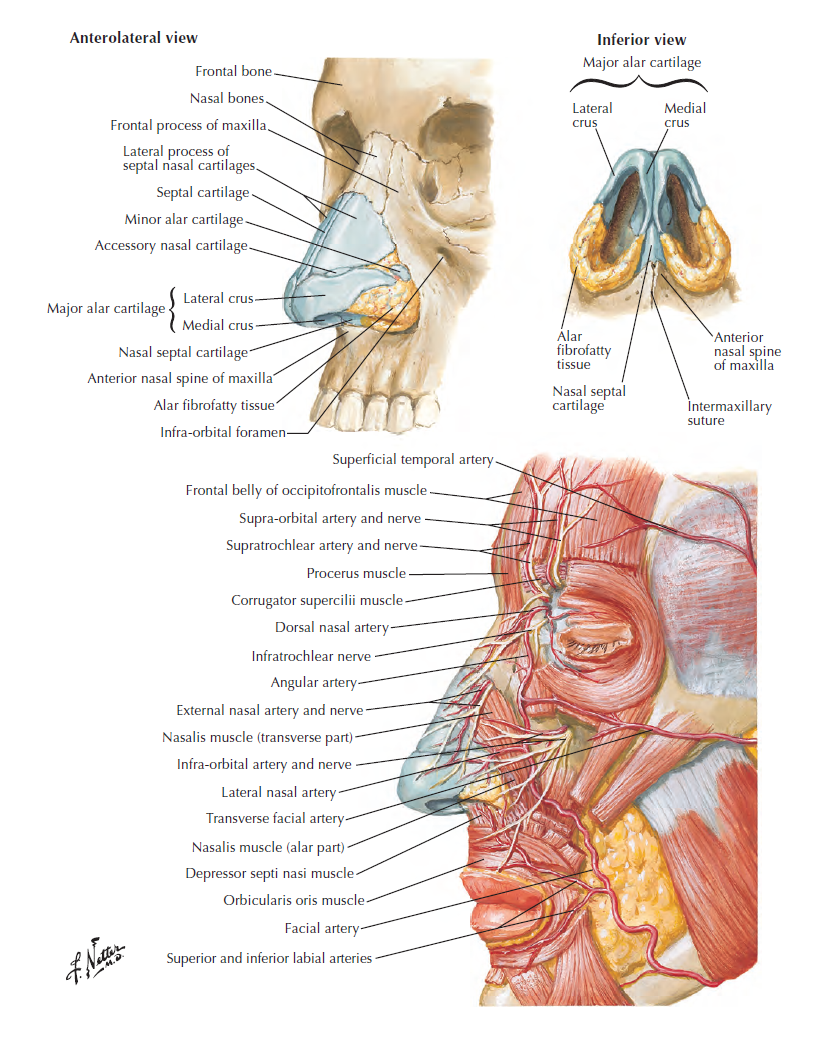
On top of the skull sit the major facial muscles that influence surface form and expression. You do not need to sculpt every anatomical detail, but you should understand how muscles affect volume and movement. The orbicularis oculi wraps around the eye and controls blinking and squinting, creating compression around the eyelids. The zygomaticus muscles pull the corners of the mouth upward during a smile, shaping the cheeks. The orbicularis oris forms the lips, while the masseter adds thickness and strength to the jaw. These muscles create subtle transitions and tension in the face that make a sculpt feel alive rather than static.
Finally, focus on planes and proportions before adding detail. The face is divided vertically into thirds (hairline to brow, brow to base of nose, base of nose to chin) and horizontally into fifths, with one eye-width spacing across the face. The eyes sit halfway down the head, not near the top. In ZBrush, establish clean plane changes using brushes like Clay Buildup and Trim Dynamic before introducing secondary forms or skin texture. If the sculpt looks soft or “mushy,” it is usually a plane issue, not a detail issue. Structure always comes first.
Topology Types
Topology refers to how polygons are organized across the surface of a model, and it directly affects how well that model deforms, subdivides, and renders. In character sculpting, especially in ZBrush, topology is not just technical, it supports anatomy and movement. Clean topology allows for predictable edge flow, smoother subdivision, and better performance when exporting to animation or rendering pipelines. Poor topology can cause pinching, stretching, and shading artifacts, even if the sculpt itself looks strong.
There are several common topology types you will encounter. Dynamic topology (such as Dynamesh or Sculptris Pro) redistributes polygons automatically as you sculpt, making it ideal for concepting and early form exploration. Quad-based topology uses four-sided polygons and is the standard for production-ready models because it subdivides cleanly and supports animation. Triangular or n-gon topology may appear in hard surface modeling or imported assets, but it can create issues when subdividing or deforming, so it is typically avoided in character work.
In this class, think of topology as workflow-dependent. Use dynamic topology during the block-in and exploration phase to focus purely on form. Once the design is resolved, transition to clean quad-based topology using tools like ZRemesher for refinement and final detailing. Strong topology supports clean edge flow around the eyes, mouth, and joints, areas that require deformation and clarity of structure. Just like anatomy, topology should serve the form, not fight it.
ZRemesher
ZRemesher is ZBrush’s automatic retopology tool used to rebuild messy or stretched geometry into clean, evenly distributed quad-based topology. You’ll typically use it after working in DynaMesh or Sculptris Pro, when your polygon distribution is no longer ideal for refinement. ZRemesher preserves the overall shape of your sculpt while reorganizing the mesh into a cleaner structure that subdivides more predictably.
As a refresher, remember the key controls: adjust Target Polygon Count to influence density, use Half to quickly reduce resolution, and tweak Adaptive Size to control how evenly polygons are distributed. For more direction over edge flow, you can draw ZRemesher Guides to suggest loop placement, especially around the eyes, mouth, and other critical anatomical areas. These tools help generate more animation-friendly topology when needed.
Workflow reminder: duplicate your Subtool before running ZRemesher. After remeshing, subdivide the new mesh and use Project All to transfer details back from the original sculpt if necessary. ZRemesher is best used once your primary forms are established, not at the sketch stage, and serves as a transition from exploratory sculpting to controlled refinement.
Projection
Projection in ZBrush is the process of transferring surface detail from one mesh to another. It is most commonly used after ZRemeshing, when you’ve created cleaner topology and need to restore the sculpted information from the original high-resolution model. Projection allows you to preserve wrinkles, forms, and subtle surface changes while benefiting from improved edge flow and polygon distribution.
The most common method is Project All, found in the Subtool palette. To use it properly, keep both the original sculpt and the new remeshed version in the same Subtool stack. Subdivide the new mesh to a similar resolution as the original, make sure it is visible, and then run Project All. ZBrush will cast rays from the active mesh to the source mesh and transfer the surface information. Adjust the Projection Distance carefully, too high can cause artifacts, too low may miss details.
As a workflow refresher: duplicate before remeshing, ZRemesh, subdivide, then project. Work gradually through subdivision levels instead of projecting everything at once to avoid distortion. Always inspect tight areas like eyelids, lips, and nostrils after projection, as these areas are most prone to errors. Projection is a recovery tool, it bridges clean topology with preserved sculpted detail.
Mouth Bags
A “mouth bag” refers to the internal cavity of the mouth that gives depth and realism to a head sculpt. Rather than leaving the lips as a closed seam or thin shell, a proper mouth bag creates an interior volume that includes thickness to the lips and space for teeth and tongue. Even if the character’s mouth is closed, the underlying cavity helps maintain believable structure, especially when posing or opening the jaw later.
In ZBrush, a mouth bag is typically created by masking the inside of the lips and extracting inward, or by inserting a simple sphere and reshaping it to form the internal cavity. The key is to ensure the lips have real thickness and that the interior does not collapse into a flat surface. The mouth should feel like a tunnel extending back into the head, not a paper-thin cut line. Clean transitions between the outer lips and the inner cavity are essential for realism.
From a workflow standpoint, create the mouth bag once your primary head forms are established but before final detailing. This allows you to sculpt lip compression, openings, and expressions more naturally. Even if you are not building full teeth and tongue, establishing interior depth strengthens the overall anatomy and prevents issues later in rendering or animation.
Curve Lathe
Curve Lathe is a brush-based tool in ZBrush used to generate symmetrical, radial forms along a drawn curve. It works by taking a selected brush profile and revolving it 360 degrees around an axis, creating objects such as horns, tentacles, cables, pipes, or ornamental shapes. Instead of manually sculpting cylindrical or radial structures, Curve Lathe allows you to quickly establish clean, controlled forms with consistent thickness and curvature.
To use Curve Lathe, select a brush that supports lathe functionality (such as a Curve-based Insert brush), draw your curve on the surface, and ZBrush will generate geometry along that path. The resulting mesh is typically a new Subtool or appended geometry, depending on settings. You can adjust the curve after placement to refine the silhouette before committing. This makes it especially useful during the block-in phase when exploring design variations.
In your workflow, Curve Lathe is best used for controlled hard-surface or stylized organic elements that require radial precision. It saves time, maintains symmetry, and produces cleaner base geometry than freehand sculpting. As always, establish the primary form first, then refine and integrate it into your sculpt using Move, Smooth, and Trim brushes as needed.
Boolean Basics
Boolean operations in ZBrush allow you to add, subtract, or intersect geometry between Subtools to create complex forms quickly. Instead of manually sculpting cuts, holes, or layered mechanical parts, Booleans let you combine simple shapes into more intricate structures. This is especially useful in hard-surface modeling, armor design, and prop creation, where precision and clean separations are important.
There are three core Boolean functions: Add (Union), Subtract, and Intersect. Add combines overlapping geometry into one unified form. Subtract removes one shape from another, creating clean cutouts or negative space. Intersect keeps only the overlapping portion between two meshes. In ZBrush, these operations are controlled through the Subtool panel using Live Boolean to preview the result before committing to a Boolean Make Mesh.
As a workflow refresher, keep your Boolean Subtools organized and clearly named. Use Live Boolean to check alignment and intersections before generating the final mesh. Once satisfied, use Make Boolean Mesh to create a new combined Subtool, then clean up with Dynamesh or ZRemesher if needed. Booleans are powerful for establishing strong structural forms quickly, but they should support your design, not replace thoughtful form development.
Homework
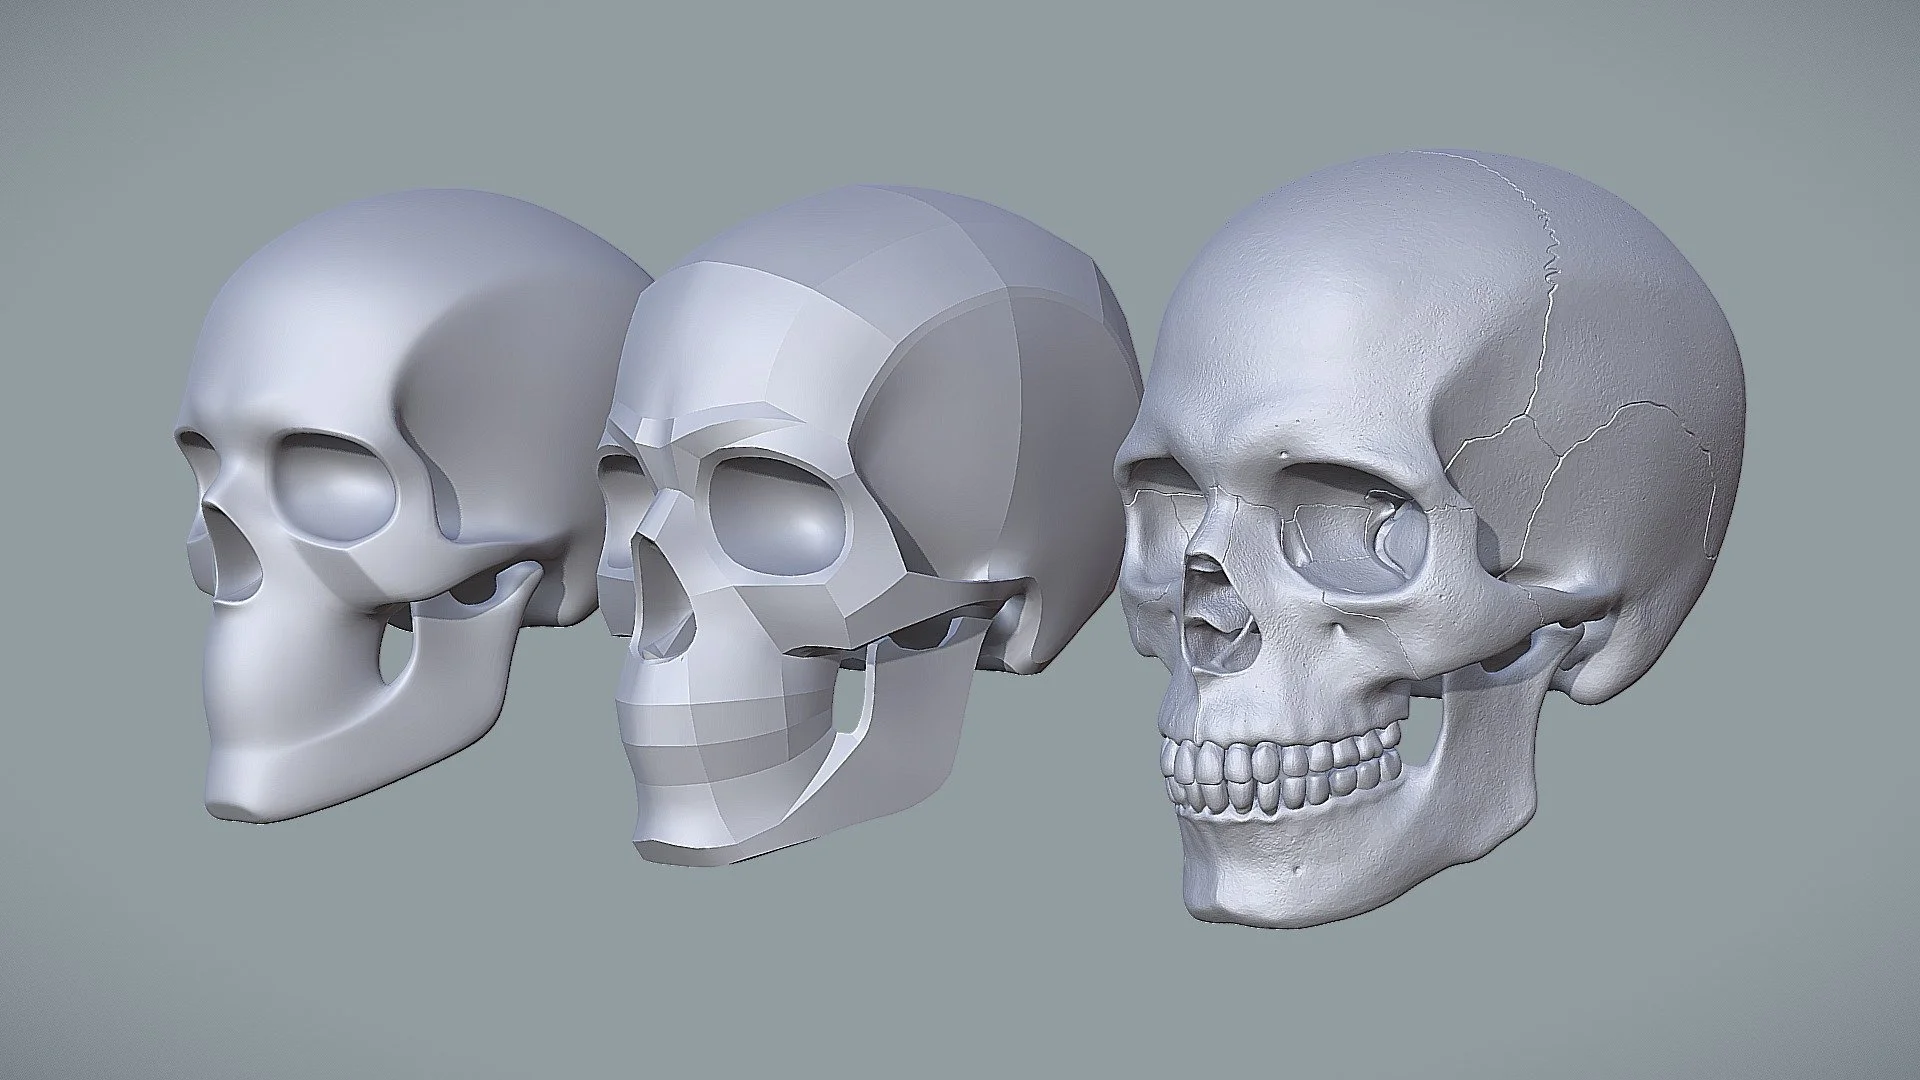
Create a reference sheet of your creature Skull
Create some concept sketches of potential creature heads
Sculpt Humanoid Creature on top of Project 1 Skull.